What is HEIC File Type? HEIC to JPG Converter Free Online
.png)
Many iPhone and iPad users encounter photos saved in the HEIC format (High Efficiency Image Container). While HEIC offers smaller file sizes with high quality, JPG remains the universal format for web, email, and most apps. This guide helps users who want a fast, reliable, and secure online method to convert HEIC files to JPG — including a step-by-step example, screenshots, SEO-friendly tips, and answers to common questions.
Who this guide is for
- Users who received HEIC photos and need JPG for compatibility (sharing, printing, web).
- People who prefer using an online converter (no software to install).
- Those who care about privacy and want secure conversion workflows.
Why HEIC vs JPG? (short explanation)
- HEIC: Newer Apple-backed format, better compression (smaller file sizes) and supports features like multiple images in one file and advanced metadata.
- JPG (JPEG): Older, almost universally supported across devices, browsers, and apps. Ideal for sharing, uploading to websites, and compatibility with older software.
Convert HEIC to JPG on iPhone (No App Needed)
If you use an iPhone, you can make it save photos as JPG automatically — no conversion needed later.
To change your default photo format:
- Open Settings → Camera → Formats
- Under “Camera Capture,” select Most Compatible
- New photos will now be saved as JPG instead of HEIC
To convert existing HEIC photos manually:
- Open a HEIC photo → tap the Share icon → choose Save as JPEG (if available in your iOS version).
- Or, share the photo via Mail or AirDrop to a non-Apple device — iOS automatically converts it to JPG during transfer.
✅ Quick Tip: AirDrop to Mac often keeps HEIC format, but emailing it converts it to JPG automatically.
Convert HEIC to JPG on Windows
Windows doesn’t natively open HEIC files on older versions, but it’s easy to fix.
Option 1: Using the Photos App (Windows 11)
- Open the HEIC photo in Photos
- Click the Edit image (pencil icon)
- Choose Save a copy → select JPG in file format
Option 2: Install HEIF Image Extensions
- Download the free “HEIF Image Extensions” from Microsoft Store
- Once installed, you can open HEIC files in Photos and use Save As → JPG
Option 3: Use an Online Converter (like CloudConvert)
Go to CloudConvert HEIC to JPG, upload your images, and download the converted JPGs.
You can even batch-convert multiple photos at once.
Convert HEIC to JPG on Mac
macOS users have it the easiest.
Method 1: Using Preview App
- Open the HEIC file in Preview
- Click File → Export
- From the dropdown, choose JPEG
- Adjust the quality slider if needed → click Save
Method 2: Using Automator (for bulk conversion)
- Open Automator → choose Quick Action
- Add action: Change Type of Images → JPEG
- Save the workflow
- Now you can right-click multiple HEIC files → Quick Actions → Convert to JPEG
Convert HEIC to JPG Online (Any Device)
If you don’t want to install anything, online converters are perfect for quick conversions.
Example: Using CloudConvert
- Visit cloudconvert.com/heic-to-jpg
- Upload your HEIC photos (you can drag & drop)
- Choose JPG as the output format
- Click Convert, then Download
Other trusted tools:
- Convertio — Easy drag & drop interface
- HEICtoJPEG.com — Lightweight and free
- iLoveIMG — Converts multiple images quickly
🛡️ Security Tip: Choose sites that use HTTPS and delete files after processing to protect your privacy.
Convert HEIC to JPG on Android
Most Android devices don’t use HEIC by default, but if you’ve received HEIC files, you can convert them easily.
Option 1: Using Google Photos
- Upload the HEIC to Google Photos
- Open it → tap Download → it saves as a JPG
Option 2: Use Apps from Play Store
- Try “Luma: HEIC to JPEG Converter” or “HEIC Converter Free”
- They support bulk conversion and offline processing
When to convert HEIC to JPG online
- You need to upload images to a site that doesn't support HEIC.
- You want to send photos to users on Windows or older Android devices.
- You want image files ready for editing in apps that prefer JPG.
- You don’t want to install additional software or plugins.
Pros & cons of online conversion
Pros
- No installation required.
- Quick for small batches.
- Accessible from any device with a browser.
Cons
- Potential privacy concerns if using unknown sites.
- Large batches may be slow or require paid plans.
- Quality settings may vary — check conversion options.
Recommended online converters (short list)
- CloudConvert — robust, supports batch conversion and options for quality/metadata.
- Convertio — user-friendly with drag-and-drop and cloud import.
- HEICtoJPEG.com — simple, dedicated converter for HEIC → JPG.
- Zamzar — long-standing file conversion service with many formats.
(In this article we use CloudConvert as an example.)
Step-by-step example: Convert HEIC to JPG using CloudConvert
Steps
- Open CloudConvert (or your chosen converter).
- Look for HTTPS in the address bar to confirm a secure connection.
- Example site: CloudConvert (cloudconvert.com).
- Look for HTTPS in the address bar to confirm a secure connection.
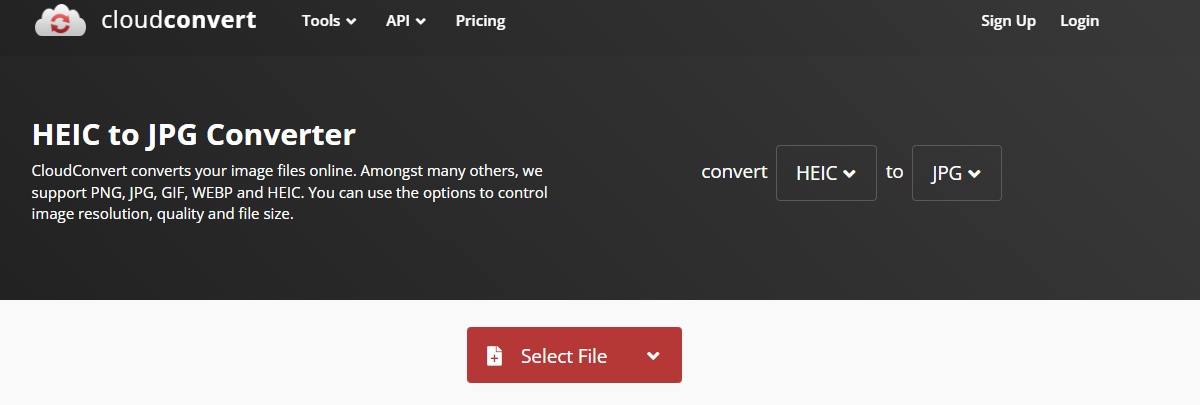
- Image 1 — Step 1: Open the converter
Download: Step 1 image — Alt text: "Open the HEIC to JPG converter site and locate the 'Select File' button." - Upload your HEIC files
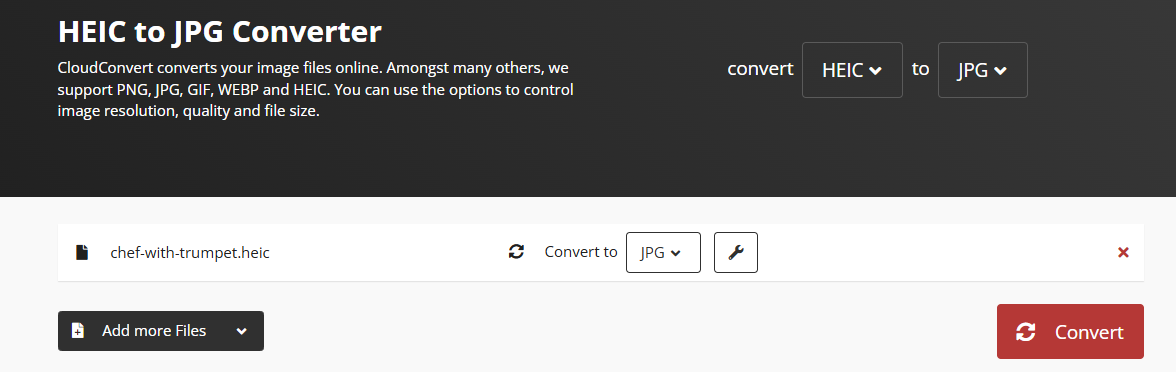
- Click Select File (or drag & drop). Choose files from your device, or import from Google Drive/Dropbox if supported.
- Wait for the upload to complete — you’ll see filenames or thumbnails.
- Click Select File (or drag & drop). Choose files from your device, or import from Google Drive/Dropbox if supported.
- Choose JPG as the output and adjust settings
- Set Output Format → JPG (sometimes labeled JPEG).
- Optional: adjust quality (e.g., 80–90%), resize, or keep metadata (EXIF) based on your needs. Higher quality = larger file size.
- Set Output Format → JPG (sometimes labeled JPEG).
- Convert and download
- Click Convert (or Start). Wait for processing.
- Click Download to save the JPG files. If multiple files, some sites prepare a ZIP you can download.
- Click Convert (or Start). Wait for processing.

Privacy & security tips
- Use websites that support HTTPS and have clear privacy policies.
- Avoid uploading sensitive images to unknown services.
- If available, use local conversion on your device for highly sensitive photos.
- After conversion, delete uploaded files from the service (many sites offer an auto-delete policy or a manual remove option).
Batch conversion & large files
- Free tiers often limit batch sizes or total file size. For many images or very large files, consider a paid plan or perform conversion locally (macOS and Windows both support ways to convert locally).
- For web uploads, compress images cautiously — too much compression reduces quality.
Alternatives: Convert locally (brief)
- macOS: Preview can export HEIC to JPG — open image → File → Export → choose JPG.
- Windows 10/11: Use Photos app or third-party apps like iMazing HEIC Converter.
- Mobile: iPhone Settings → Camera → Formats → Change to "Most Compatible" to shoot JPG by default (note: this affects future photos only).
How Hexus helps with Personalization
More Articles
.png)

.png)