.png)
Anyword is an AI copywriting tool that generates ads, posts, emails, and landing page text with predictive performance scores to boost engagement.
Introduction to Anyword AI: The Ultimate Content Creation Tool for Beginners
Creating high-quality content consistently is one of the biggest challenges for bloggers, marketers, and business owners. Whether you're struggling with writer's block or simply don't have enough hours in the day, AI-powered writing tools can be a game-changer for your productivity. Among these innovative solutions, Anyword stands out as a powerful ally for content creators of all experience levels.
Anyword is an AI-powered copywriting tool designed to help you create engaging, high-performing content for blogs, ads, emails, and social media without the usual headaches. What makes Anyword particularly valuable for beginners is its intuitive interface and guided workflows that take the guesswork out of content creation.
In this comprehensive guide, we'll walk you through everything you need to know to get started with Anyword, from signing up to publishing your first AI-generated blog post. By the end, you'll have a clear understanding of how this powerful tool can transform your content creation process and help you produce professional-quality content in minutes rather than hours.
Getting Started with Anyword: Sign-up Process and Dashboard Navigation

Getting started with Anyword is straightforward, even if you've never used an AI writing tool before. Here's how to begin your journey:
Creating Your Account
First, open your browser and navigate to anyword.com. On the homepage, you'll see options to either "Sign Up" or "Log In." If you're new to the platform, click on "Sign Up" to create your account.
Anyword offers a simple registration process with two main options:
- Sign up with your email address
- Continue with Google for a faster authentication process
If you choose the Google integration route, you'll be redirected to a Google authentication page where you can select your account and grant the necessary permissions. This streamlined approach gets you into the platform with just a few clicks.
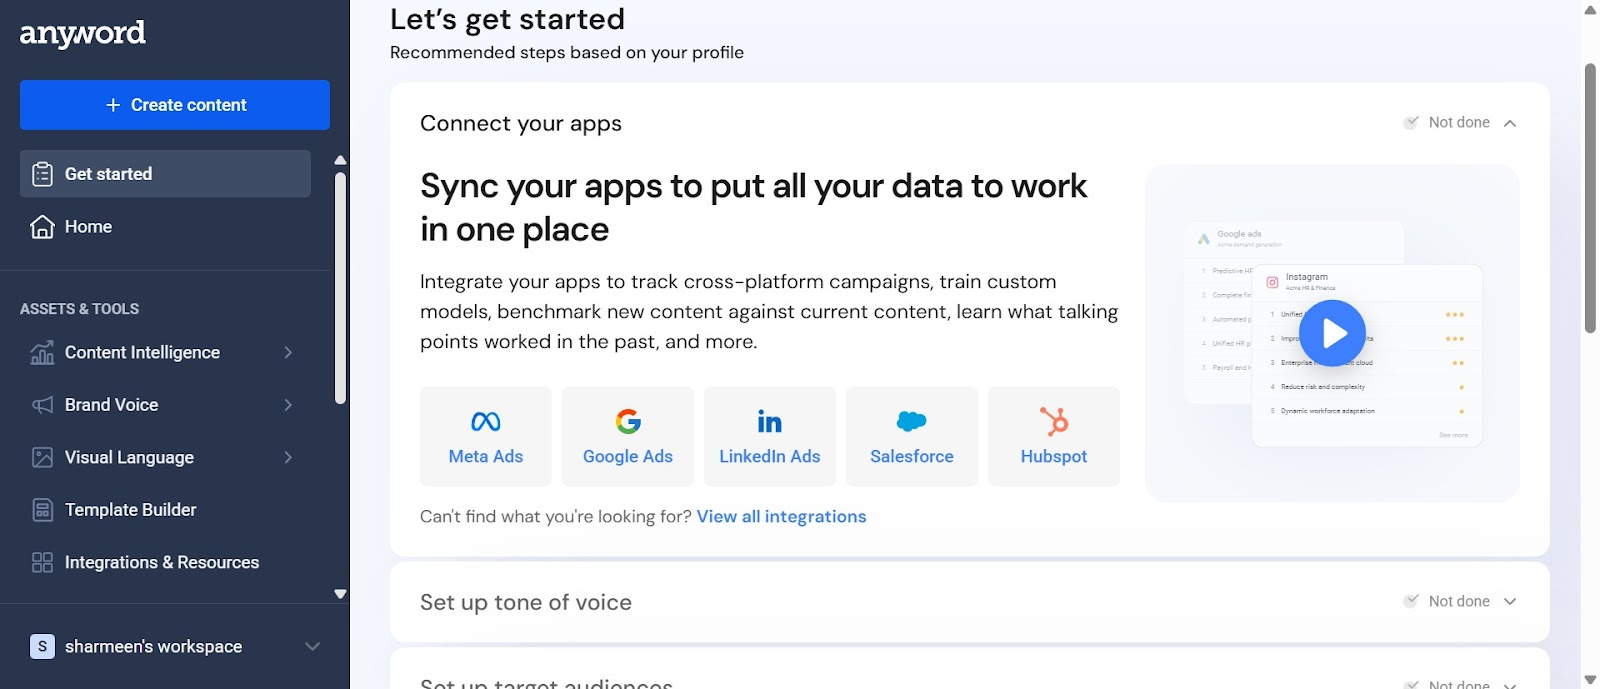
Navigating the Dashboard
Once you've successfully logged in, you'll land on the Anyword dashboard. This central hub is where all your content creation projects will live. The clean, intuitive layout makes it easy to find what you need:
- The main menu showcases different content creation options like Blog Wizard, Social Media, Ads, Email Copy, and Product Descriptions
- The "Create Content" button in the top left corner serves as your starting point for any new project
- Previously created projects appear in your dashboard for easy access and management
Take a moment to familiarize yourself with the dashboard layout. The well-organized interface puts everything you need at your fingertips, making it easy to jump between different types of content creation tasks without feeling overwhelmed.
Creating Your First Blog Post with Anyword's Blog Wizard
Now that you're familiar with the dashboard, let's dive into creating your first blog post using Anyword's Blog Wizard. This feature is specifically designed to simplify the blog creation process from start to finish.
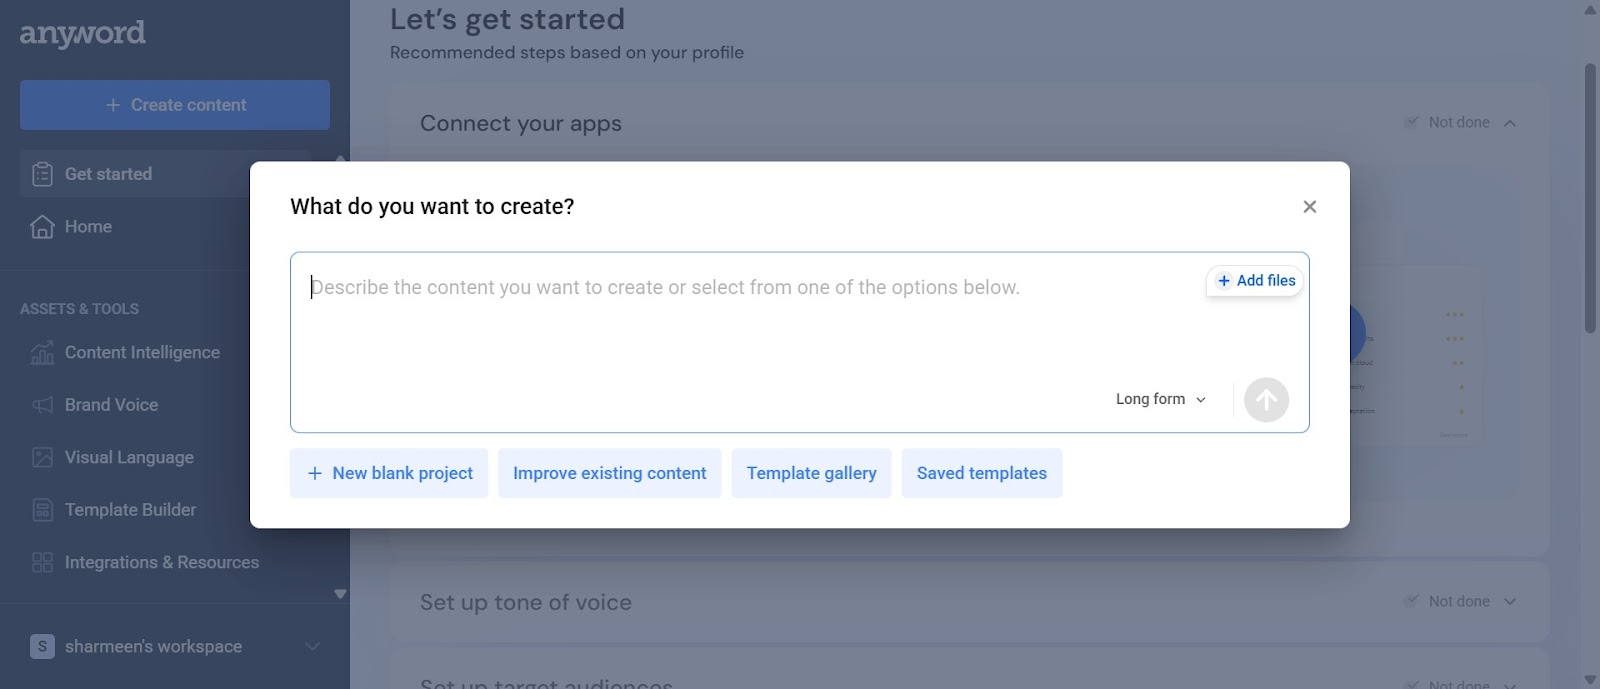
Launching the Blog Wizard
To begin, click on the "Create Content" button in the top left corner of your dashboard. From the options that appear, select "Blog Wizard." This will launch Anyword's specialized tool for blog content creation.
Defining Your Topic
The Blog Wizard will prompt you to describe the content you want to create. This is where you'll enter your topic or headline idea. For example, you might type something like:
"Write a blog post about the top 10 free AI tools for students in 2025, optimized for SEO with keywords like free AI tools, productivity apps, study hacks."
The more specific your prompt, the better results you'll get. Include details about:
- Your main topic
- Target audience
- Desired SEO keywords
- Any specific angle or approach you want to take
After entering your prompt, click "Next" to proceed. Anyword may offer suggestions to improve your prompt, which you can either accept or bypass by selecting "No thanks, I want to use the prompt."
Generating Your Blog Content
Once you've defined your topic, Anyword will generate possible outlines for your blog post. Review the options and select the one that best aligns with your vision. The AI will then build a complete draft based on your chosen outline.
The Blog Wizard automatically creates an engaging introduction section to hook your readers. From there, it develops the body of your post according to the outline structure, complete with relevant subheadings, paragraphs, and a conclusion.
The first draft appears quickly, often in just a minute or two, giving you a solid foundation to work with. You'll notice that Anyword automatically incorporates your specified keywords naturally throughout the text, helping with SEO optimization without making the content feel forced or unnatural.
Customizing Your Content: Adding Sections, SEO Keywords, and Style Adjustments
While Anyword's initial draft is often impressive, the real magic happens when you start customizing the content to perfectly match your vision. The platform offers several powerful tools to refine your blog post:
Adding and Modifying Sections
If you want to expand your blog post with additional information, click on the "Add Section" button. From the menu that appears, select "General Text" to create a flexible content block. You can name this new section anything you like—for instance, "Key Points" or "Expert Tips."
For each section, you can:
- Write a custom description of what you want the section to cover
- Specify the tone and style for that particular section
- Indicate the desired length (short, medium, or long)
Optimizing for SEO
Anyword excels at SEO optimization. When customizing a section, you can click on "SEO Keywords" to specify which terms should be incorporated. You can choose to use:
- Keywords from your blog topic
- Custom keywords you add manually
This gives you full control to expand or refine your article step by step, ensuring each section contributes to your overall SEO strategy while maintaining a natural flow.
Refining Style and Tone
Once your draft is complete, you can further polish it using Anyword's refinement tools:
- Use the "Improve" option to enhance specific paragraphs or sections
- Click "Continue" to have the AI extend a section with additional content
- Adjust tone settings to make your content more professional, casual, or academic
- Modify the length of sections to better balance your article
The platform also includes an AI-powered grammar and spell checker with writing style suggestions, ensuring your final piece is polished and professional.
Finalizing Your Content
When you're satisfied with your blog post, you can name your project for easy reference later. Simply click on "Untitled project" and enter a descriptive name like "Free Tool Guide" or "SEO Blog Post."
Finally, use the "Copy to clipboard" button to transfer your content to your blog platform, website, or content management system. Anyword ensures your writing is SEO-optimized and audience-tailored, ready to publish without additional editing.
Conclusion: Maximizing Productivity with Anyword's AI-Powered Features
Anyword represents a significant leap forward in content creation technology, especially for beginners who might find traditional writing processes intimidating or time-
This blog was created using Hexus in <5 mins. Hexus enables you to create product demos, videos, and guides from one collaborative platform that automates 90% of content work with AI.
- Use it for website demand generation, product launches, and sales enablement
- Automatically blur sensitive data, add contextual highlights, callouts, and pointers.
- Collaborate across functions with shared folders and feedback, while localizing content into 20+ languages instantly.
-Track performance with real-time analytics and refresh content with just a few clicks
.png)